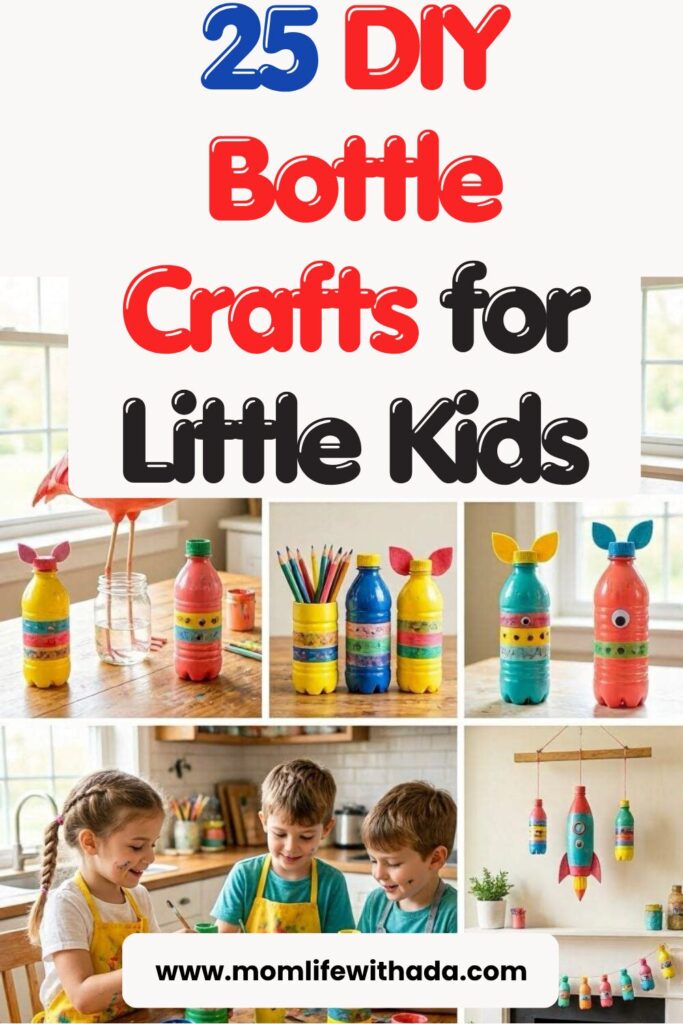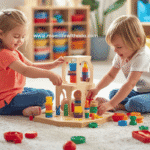
Bottle art for kids is one of the easiest and most exciting craft activities you can do at home. If you have empty plastic bottles lying around, you already have the main supply you need.
These fun crafts are cheap, simple to make, and perfect for keeping little kids busy without relying on screens all day. From cute animals to colorful decorations, bottle art for kids helps children stay creative while having so much fun with things you would normally throw away.
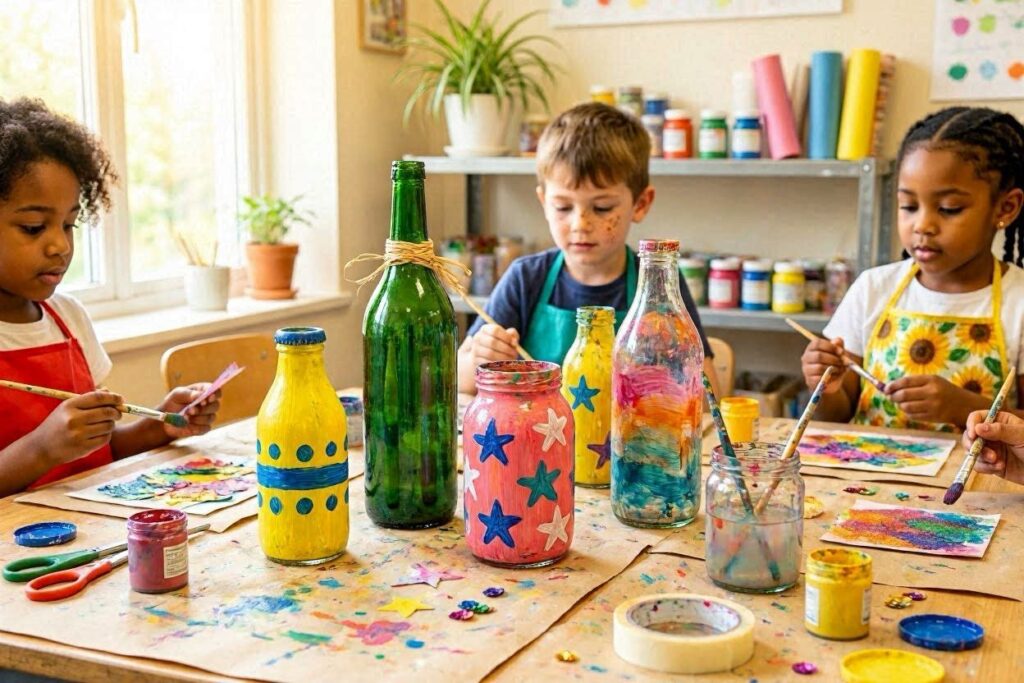
In this post, I am sharing 25 easy bottle art ideas for kids that are perfect for toddlers, preschoolers, and even older children. If you want a quiet afternoon activity or a fun weekend project, these DIY bottle crafts for kids will keep little hands busy and creative minds growing. Plus, and I promise this is true, most of these crafts are so cute that you will want to make them yourself.
📌 Affiliate Disclaimer: This post may contain affiliate links. If you click and make a purchase, I may earn a small commission at no extra cost to you. I only recommend products I truly love and use. Thank you for supporting MomLife with Ada!
Why Bottle Art Is a Brilliant Idea for Kids
Before we jump into the ideas, let me quickly tell you why this type of craft is so worth your time. First of all, it is basically free. You are using bottles that would otherwise end up in your recycling bin. Secondly, bottle art builds fine motor skills, encourages creativity, and keeps kids engaged for a surprisingly long time. My daughter spent a whole hour decorating just one bottle, and that, dear mama, is a win.
Also, if sensory play is something you enjoy doing with your little one, these easy bottle art ideas work beautifully alongside activities like these 25 easy sensory bin ideas for toddlers.
General Materials Your Kids Will Need for Most Bottle Art Ideas
Most of these DIY bottle crafts for kids use basic supplies you probably already have. Here is what to gather before you start:
- Empty plastic bottles (water bottles, soda bottles, juice bottles)
- Acrylic paint or washable tempera paint
- Paintbrushes in different sizes
- Scissors and craft knife (for adult use only)
- Glue — white craft glue or a glue gun
- Colorful paper, foam sheets, and felt
- Googly eyes, stickers, and pom poms
- Markers and glitter glue
- String, twine, or ribbon
- Sand, rice, or small beads (for sensory bottles)
25 Easy Bottle Art Ideas for Kids at Home
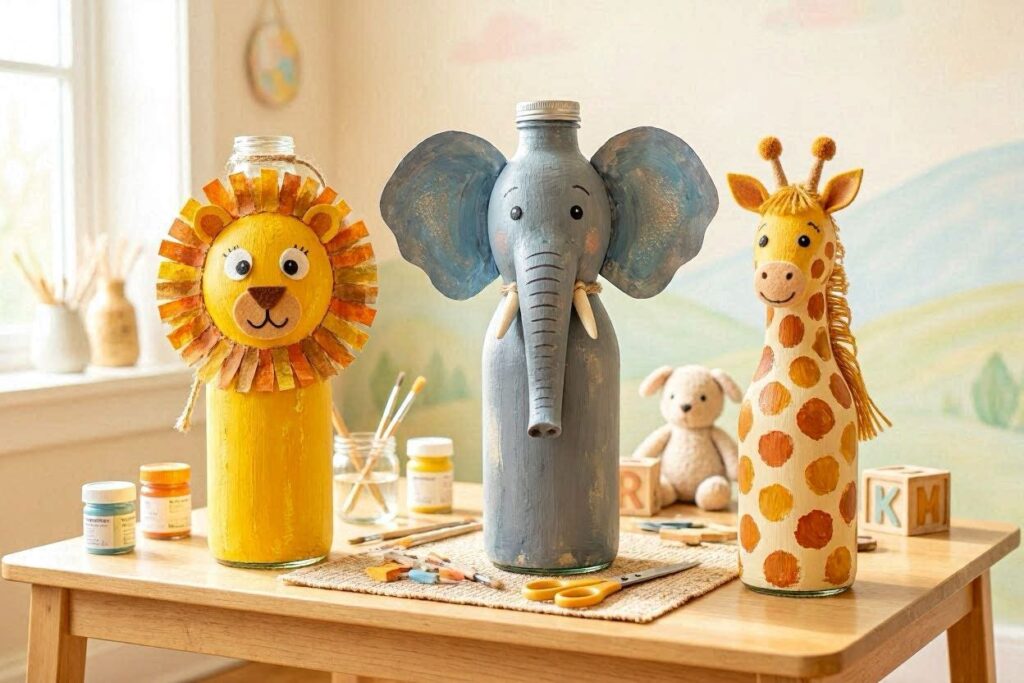
1. Painted Animal Bottles
These are a huge hit with younger kids. You can turn any plastic bottle into a cute animal with just a bit of paint and some craft supplies. This is one of the most popular easy bottle art ideas because kids feel so proud of their finished animal.
Materials needed:
- Empty plastic bottle
- Acrylic paint in animal colors
- Googly eyes
- Foam sheets for ears and tails
- Glue
Step-by-step:
- Wash and dry your empty bottle completely.
- Paint the whole bottle in your chosen animal color. Let it dry fully.
- Cut ears, horns, or tails from foam sheets and glue them on.
- Stick on googly eyes and draw a nose and mouth with a marker.
- Add any extra details like stripes or spots.
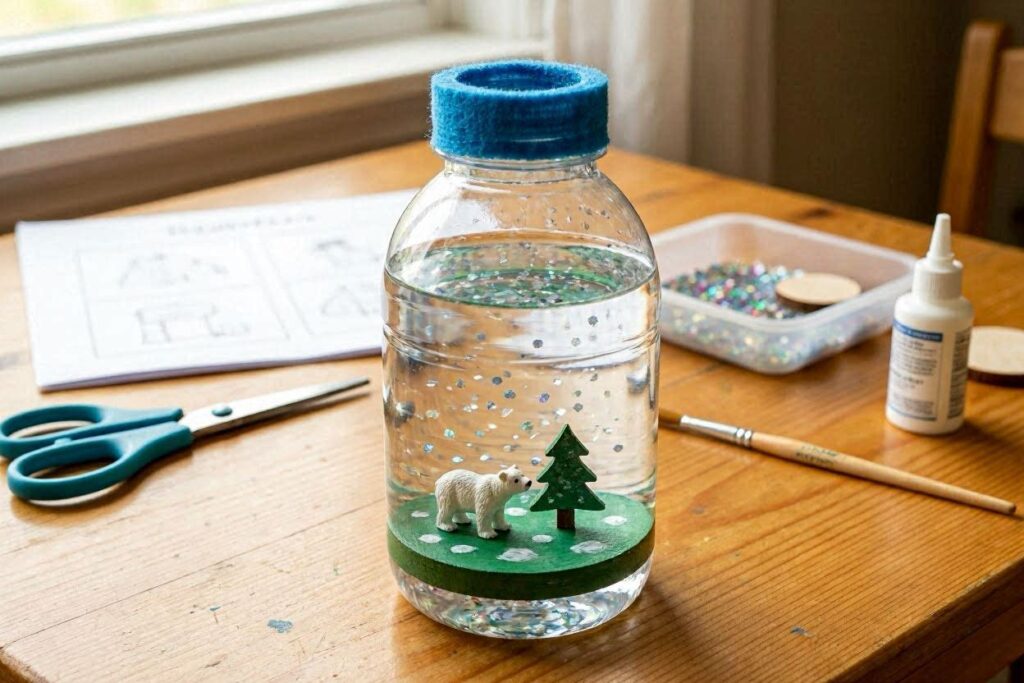
2. DIY Snow Globe Bottle
This one looks magical and is surprisingly simple to make. It is a wonderful bottle art project for kids during the holiday season or really any time of year. My son shook his for about twenty minutes straight.
Materials needed:
- Clear plastic bottle with a tight lid
- Water and glycerin (or baby oil)
- White glitter or fake snow
- Small plastic figurine or toy
- Waterproof glue
Step-by-step:
- Glue the small figurine to the inside of the bottle cap. Let it dry completely.
- Fill the bottle about three-quarters with water.
- Add a good squeeze of glycerin or baby oil.
- Pour in your white glitter or fake snow.
- Seal the lid tightly with waterproof glue and let it cure.
- Turn it upside down and watch the snow fall!
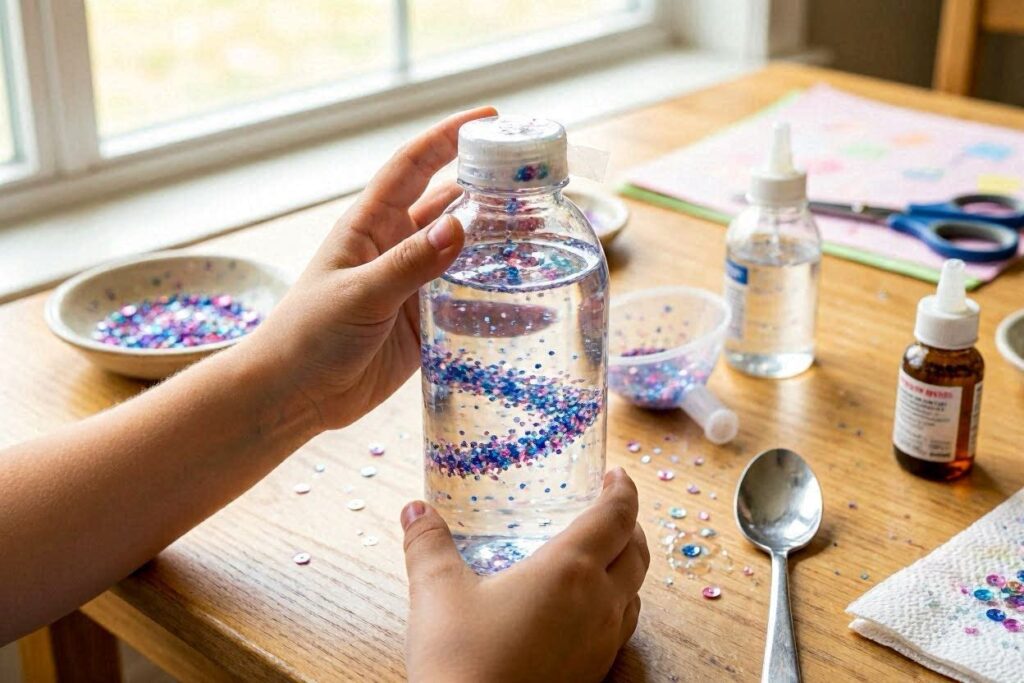
3. Sensory Calm-Down Bottle
If your child gets easily overwhelmed or upset, a calm-down bottle is genuinely one of the most useful things you can make. It is also a perfect partner to edible sensory play ideas for babies and other calming activities.
Materials needed:
- Clear plastic bottle with a tight lid
- Warm water
- Glitter glue (2-3 tubes)
- Extra fine glitter
- Super glue to seal the lid
Step-by-step:
- Fill the bottle halfway with warm water.
- Squeeze in two or three full tubes of glitter glue.
- Add extra glitter for more sparkle.
- Top up with a little more warm water, leaving a small gap at the top.
- Seal the lid tightly with super glue.
- Shake and watch the glitter slowly swirl and settle — deeply calming for little ones.
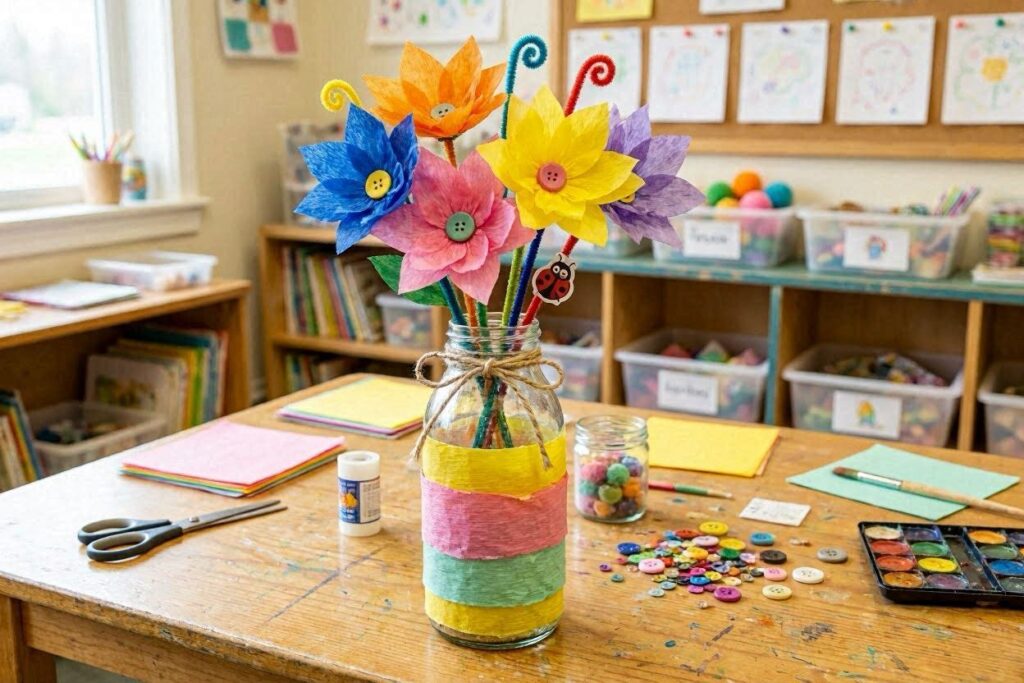
4. Bottle Vase with Paper Flowers
This easy bottle art idea is perfect for Mother’s Day, Teacher Appreciation Day, or just because. Kids feel incredibly proud giving these as gifts, and honestly they look so pretty on a shelf.
Materials needed:
- Empty glass or plastic bottle
- Twine or ribbon
- Colorful tissue paper or crepe paper
- Craft wire
- Paint or washi tape for decoration
Step-by-step:
- Wrap the outside of the bottle with twine, securing with glue as you go.
- Cut tissue paper into petal shapes and scrunch to form flowers.
- Attach a small craft wire stem to each flower.
- Arrange the paper flowers in the bottle.
- Add a ribbon bow for a finishing touch.
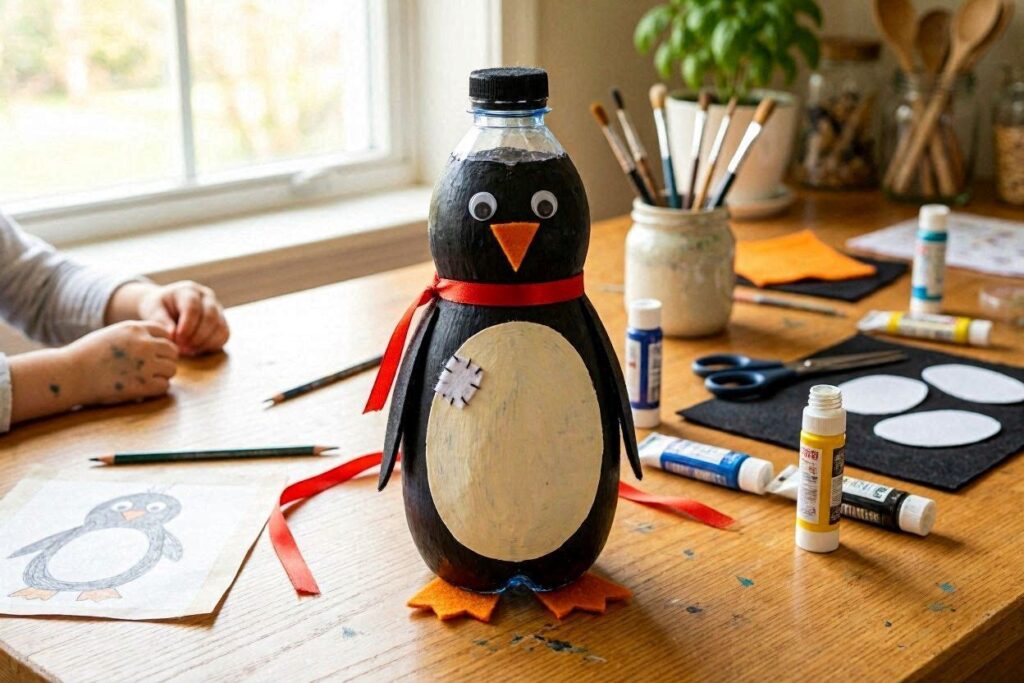
5. Bottle Penguin Craft
Kids absolutely love this one. It is one of those DIY bottle crafts for kids that looks complicated but is actually very straightforward. Even a three-year-old can help paint the body.
Materials needed:
- Small plastic bottle
- Black and white paint
- Orange felt or foam
- Googly eyes
- Glue
Step-by-step:
- Paint the entire bottle black. Let it dry.
- Paint a white oval shape on the front for the belly.
- Cut a small triangle from orange felt for the beak.
- Cut two small wing shapes from black felt.
- Glue on the beak, wings, and googly eyes.
- Add two small orange feet cut from foam at the base.
6. Rainbow Sensory Bottle
Layered sensory bottles are one of those easy bottle art ideas that look like they took ages but are actually done in under fifteen minutes. They are also great paired with the best sensory play activities for babies 6 to 12 months.

Materials needed:
- Clear plastic bottle
- Colored sand or colored rice (red, orange, yellow, green, blue, purple)
- Funnel
- Super glue
Step-by-step:
- Use a funnel to pour each color of sand one at a time into the bottle.
- Pour slowly so the layers stay separated.
- Keep going until you have a beautiful rainbow inside.
- Seal the lid tightly with super glue.
7. Bottle Rocket Ship
For all the little astronauts out there, this bottle art project for kids is absolutely out of this world. It is one of those easy bottle art ideas that sparks so much imaginative play after the craft is done.

Materials needed:
- Large plastic bottle
- Cardboard
- Silver and red paint
- Tissue paper in red and orange for flames
- Tape and glue
Step-by-step:
- Paint the bottle silver and let it dry completely.
- Cut four triangular fins from cardboard and paint them red.
- Tape the fins evenly around the bottom of the bottle.
- Cut a cone shape from cardboard for the nose, roll it, and glue it to the top of the bottle.
- Scrunch red and orange tissue paper and stick it under the base for flames.
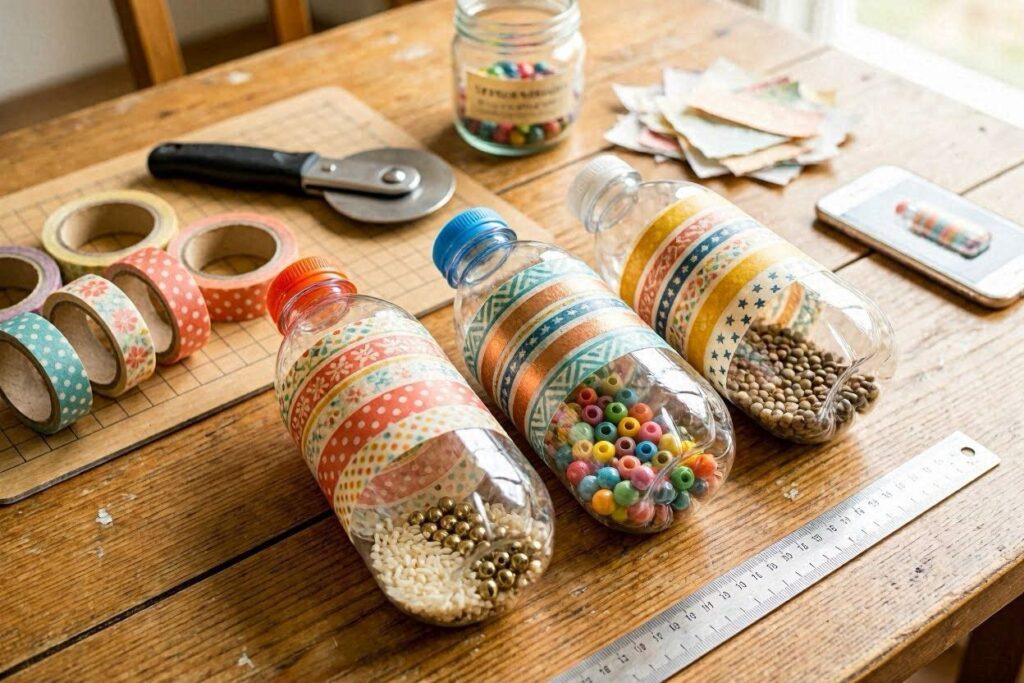
8. Musical Shaker Bottles
These are brilliant for toddlers who love music and noise — which is basically every toddler ever. Making shaker bottles is one of the easiest DIY bottle crafts for kids, and the instruments they create are genuinely fun to play with.
Materials needed:
- Small plastic bottles with tight lids
- Rice, dried beans, or small beads
- Washi tape or stickers for decoration
- Super glue
Step-by-step:
- Pour your chosen filling into the bottle, experiment with different amounts for different sounds.
- Seal the lid securely with super glue.
- Let kids decorate the outside with washi tape, stickers, and markers.
- Shake, shake, shake!
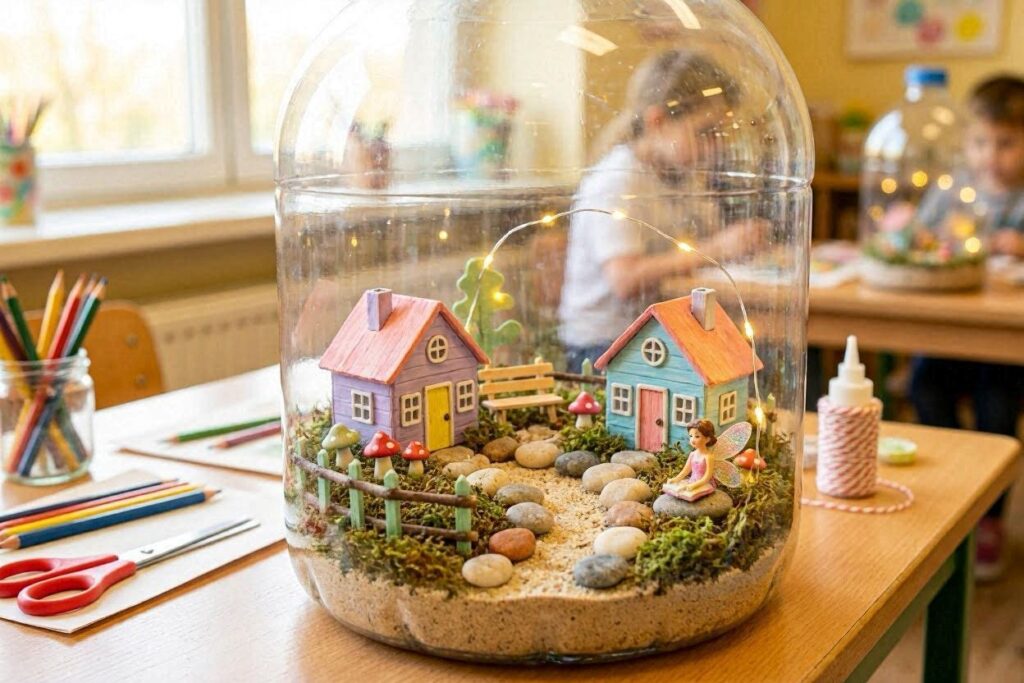
9. Bottle Fairy Garden
This is one of those bottle art ideas that feels like pure magic. Kids can create a whole tiny world inside a bottle, and it makes a beautiful display piece on a windowsill.
Materials needed:
- Large clear plastic bottle, cut open (adult does the cutting)
- Small pebbles and soil
- Tiny plastic fairy figurines
- Small artificial flowers or moss
- Mini fence pieces from the craft store
Step-by-step:
- An adult cuts the top third off the bottle to create an open container.
- Place a layer of small pebbles at the bottom for drainage.
- Add a layer of potting soil on top.
- Press in artificial moss and tiny flowers.
- Arrange the fairy figurines and mini fence pieces.
- Mist lightly with water if using real moss or small plants.
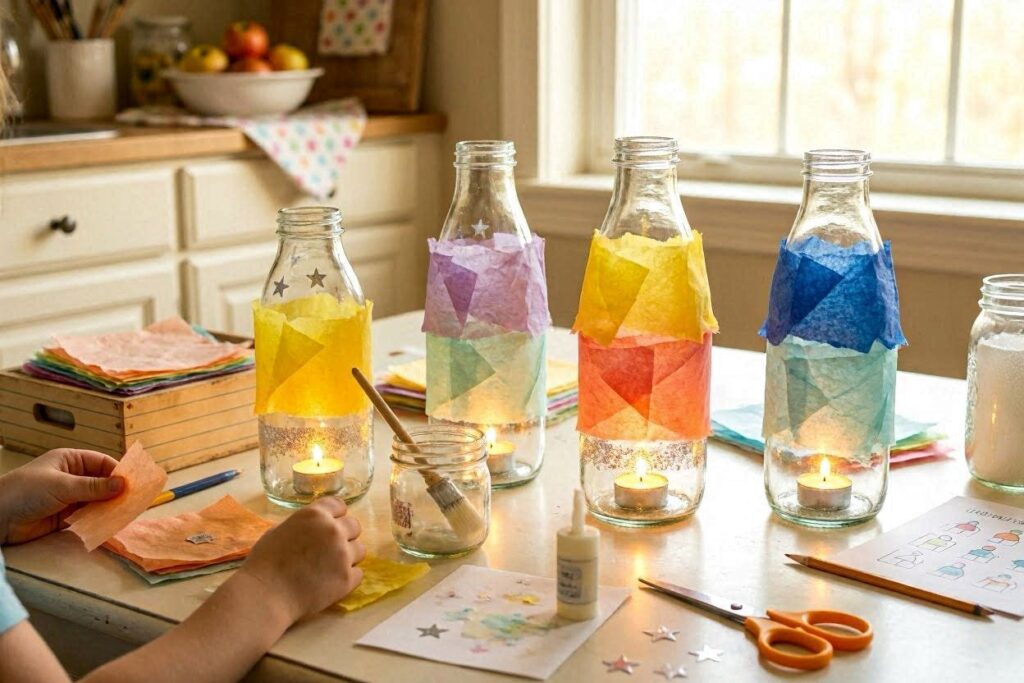
10. Bottle Luminaries
These are stunning when lit up at night. This is one of those easy bottle art ideas that works beautifully as a room decoration. Kids love seeing how the colors glow when you put a small battery-operated light inside.
Materials needed:
- Clean plastic or glass bottle
- Colorful tissue paper, torn into small pieces
- Diluted white craft glue (Mod Podge works well)
- Paintbrush
- Battery-operated LED tea light
Step-by-step:
- Brush diluted glue onto a small section of the bottle.
- Press tissue paper pieces onto the glue, overlapping them.
- Continue until the whole bottle is covered in tissue paper.
- Brush another layer of diluted glue over the top to seal.
- Let it dry completely — this usually takes a few hours.
- Drop an LED tea light inside and watch it glow beautifully.
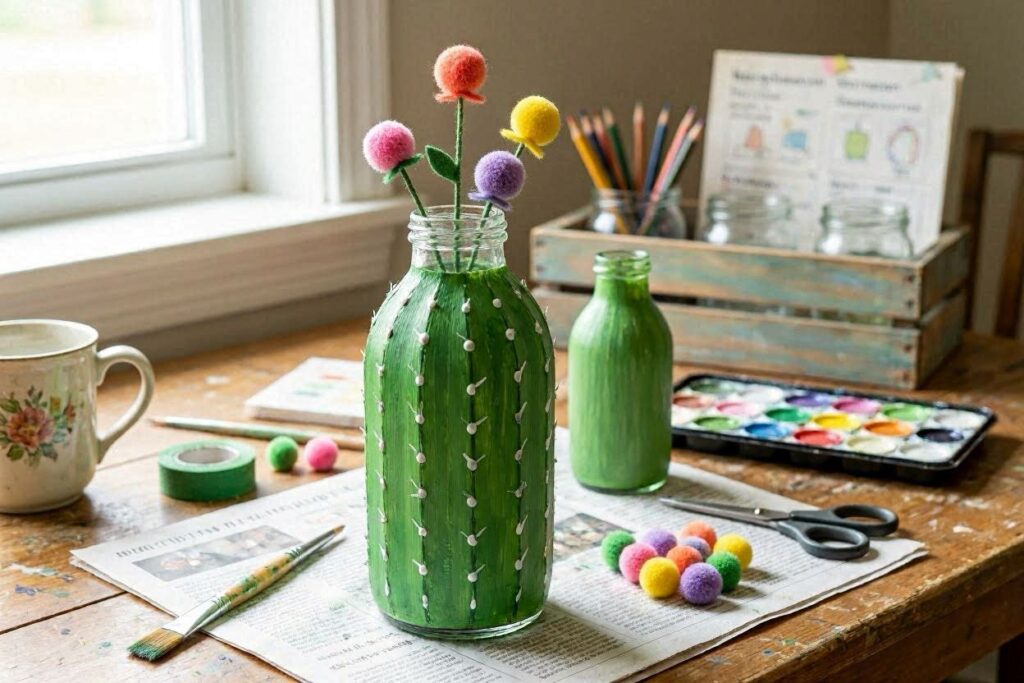
11. Bottle Cactus Craft
This adorable bottle art project for kids is perfect for spring or summer. It is one of those easy bottle art ideas that looks great on a shelf and requires very little mess.
Materials needed:
- Small plastic bottle
- Green paint
- White paint or pen for cactus lines
- Bright pom poms for flowers
- Small pot or cup as a base
Step-by-step:
- Paint the bottle green. Let it dry.
- Draw small diagonal lines across the bottle with white paint to mimic cactus texture.
- Glue bright pom poms to the top of the bottle like cactus flowers.
- Place the bottle inside a small terra cotta pot or colorful cup.
- Optionally fill the pot with sand or pebbles to hold it upright.
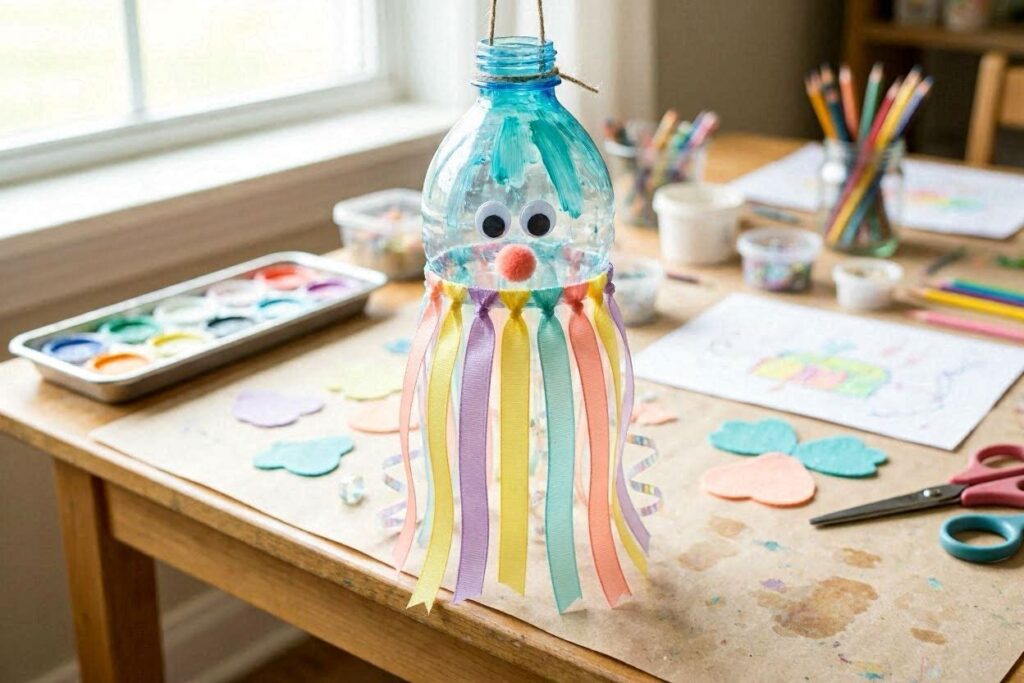
12. Bottle Jellyfish
This one is so fun to hang from the ceiling. It sways beautifully and looks like an actual underwater scene. It is a great, easy bottle art idea to combine with an ocean theme activity.
Materials needed:
- Clear plastic bottle
- Ribbon or strips of cellophane in various colors
- Paint or food coloring
- Googly eyes
- String for hanging
Step-by-step:
- Fill the bottle halfway with water and a few drops of food coloring.
- Poke small holes around the bottom edge of the bottle (adult step).
- Thread ribbon or cellophane strips through the holes for tentacles.
- Glue googly eyes on the front.
- Tie a string around the bottle neck and hang it from the ceiling.
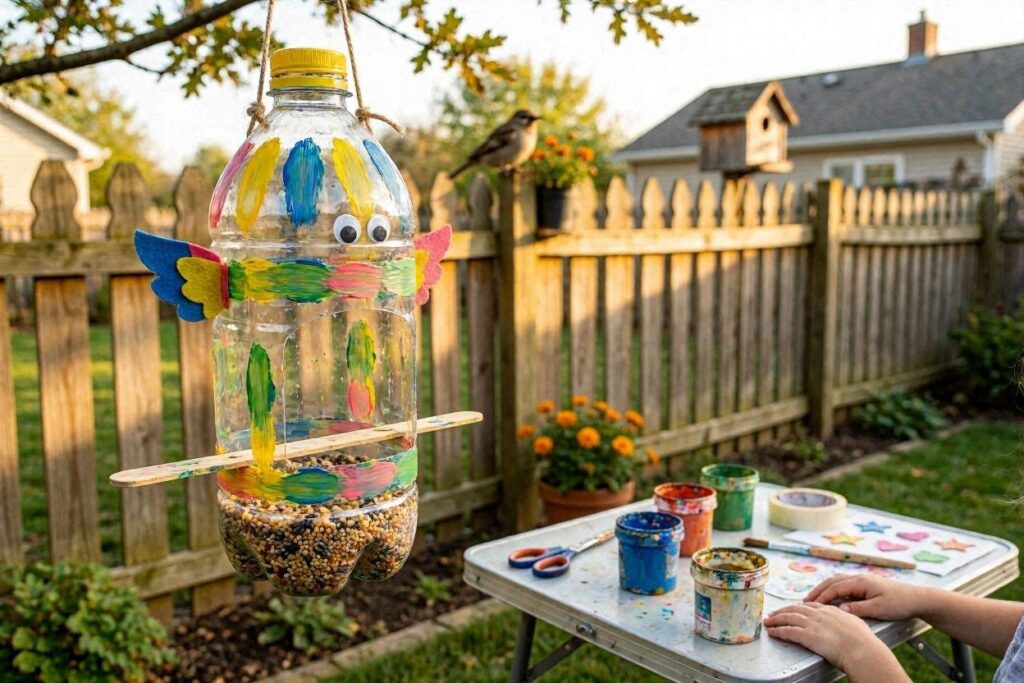
13. Bottle Bird Feeder
This is a wonderful outdoor bottle art project that teaches kids about nature. It is also one of the most practical DIY bottle crafts for kids because the finished product actually gets used every single day.
Materials needed:
- Large plastic bottle
- Two wooden chopsticks or sticks
- Strong string or twine
- Bird seed
- Craft knife (adult use)
Step-by-step:
- An adult uses the craft knife to poke two holes near the bottom of the bottle for the chopstick perches.
- Insert chopsticks through both sides so birds can stand on them.
- Cut small holes just above each perch so birds can access the seed.
- Fill the bottle with bird seed.
- Tie the string around the neck and hang it from a tree branch.
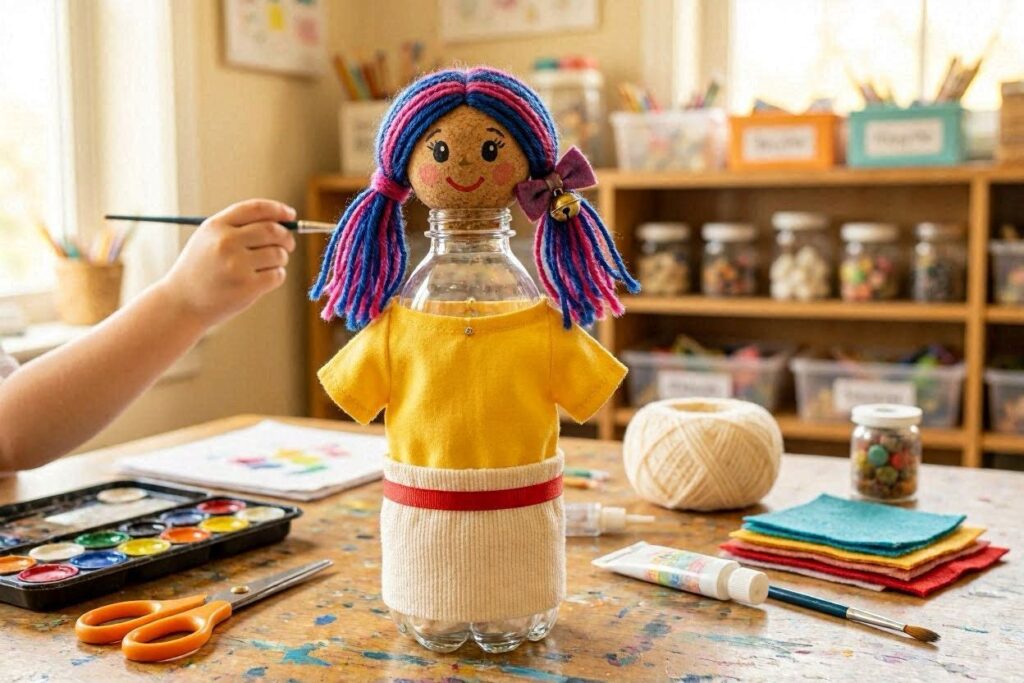
14. Bottle Doll
Kids absolutely adore making their own toys, and this bottle doll is one of those easy bottle art ideas that results in a toy they will actually play with for days afterward.
Materials needed:
- Plastic bottle
- Yarn for hair
- Fabric scraps for clothes
- Paint for the face
- Markers and glue
Step-by-step:
- Paint a face on the upper part of the bottle. Let it dry.
- Cut many pieces of yarn to the same length for the hair.
- Glue yarn pieces across the top of the bottle, fanning out on both sides.
- Cut a small rectangle of fabric and wrap it around the lower half of the bottle as a skirt or outfit.
- Add any accessories using felt, ribbon, or stickers.
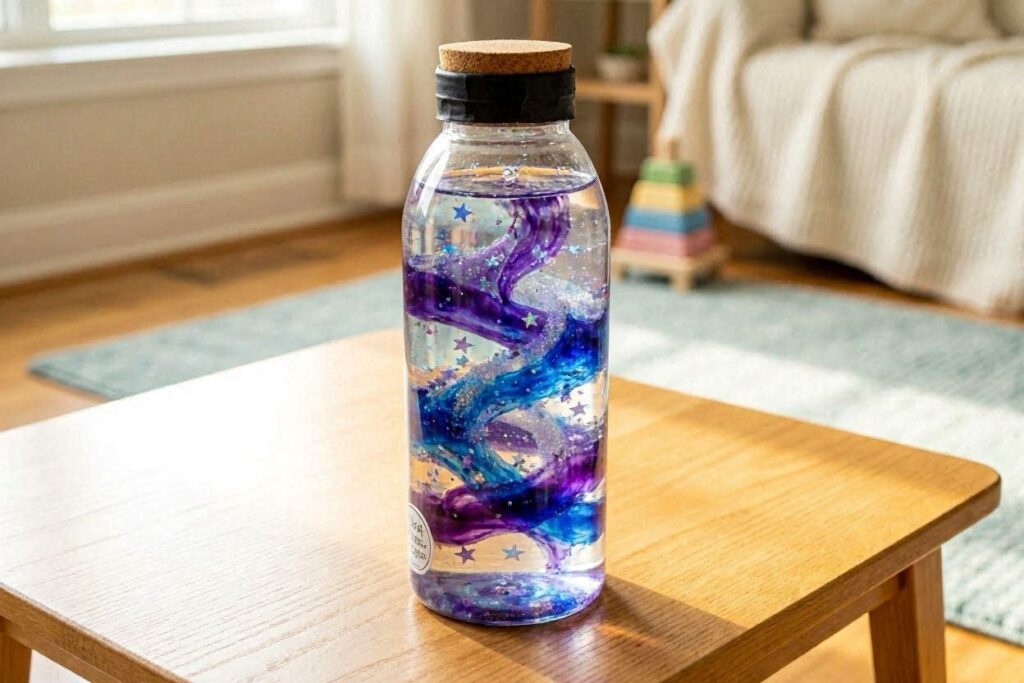
15. Galaxy Bottle
This is genuinely mesmerizing for both kids and adults. It is one of those easy bottle art ideas for kids at home that looks incredibly impressive but takes less than ten minutes to put together.
Materials needed:
- Clear plastic bottle with a tight lid
- Water
- Glitter in purple, blue, silver, and pink
- A few drops of purple or blue food coloring
- Super glue
Step-by-step:
- Fill the bottle with water, leaving a little space at the top.
- Add drops of purple or blue food coloring.
- Pour in generous amounts of all the glitter colors.
- Seal the lid with super glue.
- Tilt and swirl to watch the galaxy come alive.
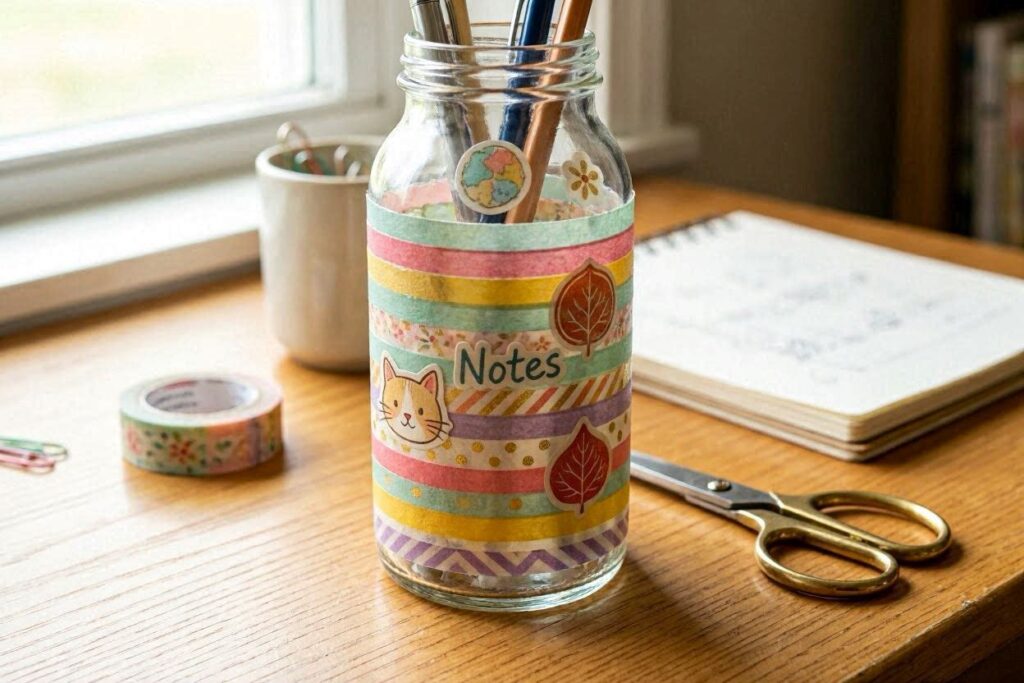
16. Bottle Pen Holder
This is one of those practical DIY bottle crafts for kids that also makes a great gift for teachers or grandparents. It is quick, easy, and so charming when finished.
Materials needed:
- Plastic bottle, cut to about 5 inches tall (adult does cutting)
- Washi tape in various patterns
- Stickers and foam letters
- Markers
Step-by-step:
- An adult cuts the bottle to the right height, smoothing any sharp edges with sandpaper.
- Kids wrap strips of washi tape around the outside, mixing patterns.
- Add stickers, foam letters, or drawn designs with markers.
- Let it dry and fill it with pens, pencils, or crayons.
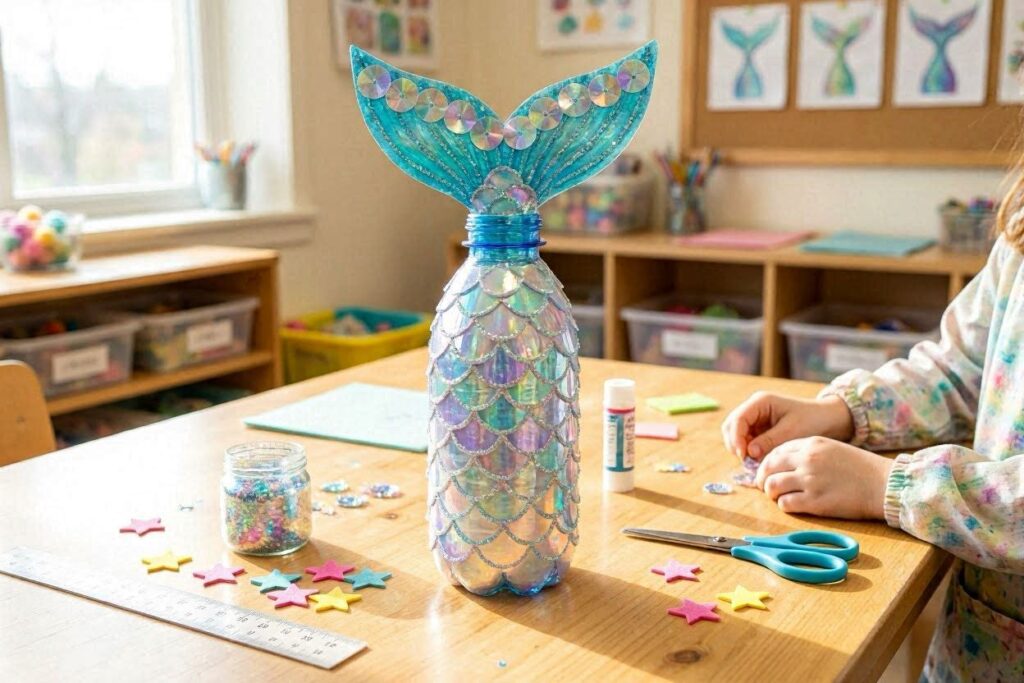
17. Bottle Mermaid Tail
Little ones who love mermaids will go absolutely wild for this one. It is one of the prettiest easy bottle art ideas, and the shimmer effect is just beautiful.
Materials needed:
- Plastic bottle
- Iridescent or metallic paint in teal and purple
- Glitter
- Cardboard for tail fins
- Glue
Step-by-step:
- Paint the bottle in alternating teal and purple scales using a small sponge.
- While wet, sprinkle glitter all over for that mermaid shimmer.
- Cut a mermaid tail shape from cardboard and paint it to match.
- Let everything dry completely, then glue the tail to the bottom of the bottle.
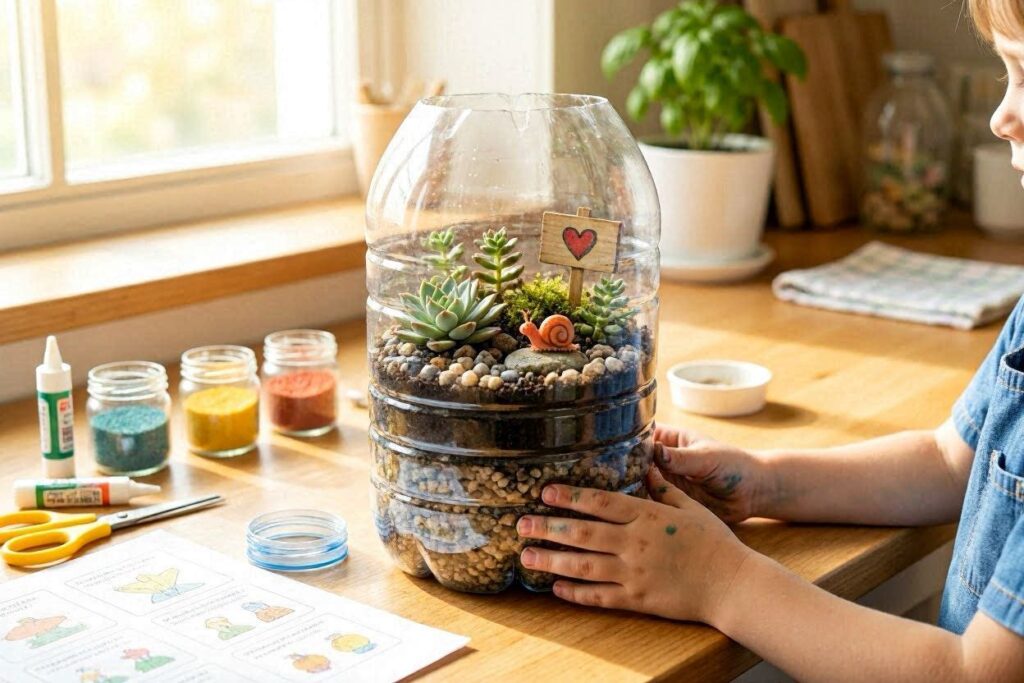
18. Bottle Terrarium
This is a wonderful bottle art project that combines creativity with a little bit of science. It is a great way to teach kids about plants and ecosystems in a hands-on way.
Materials needed:
- Large, clear plastic bottle
- Small pebbles
- Activated charcoal (optional)
- Potting soil
- Small plants like moss or succulents
Step-by-step:
- An adult cuts the top off the bottle and smooths the edges.
- Layer pebbles at the bottom for drainage.
- Add a thin layer of activated charcoal if available.
- Add a generous layer of potting soil.
- Plant small succulents or press moss into the soil.
- Water lightly and place near a window with indirect light.
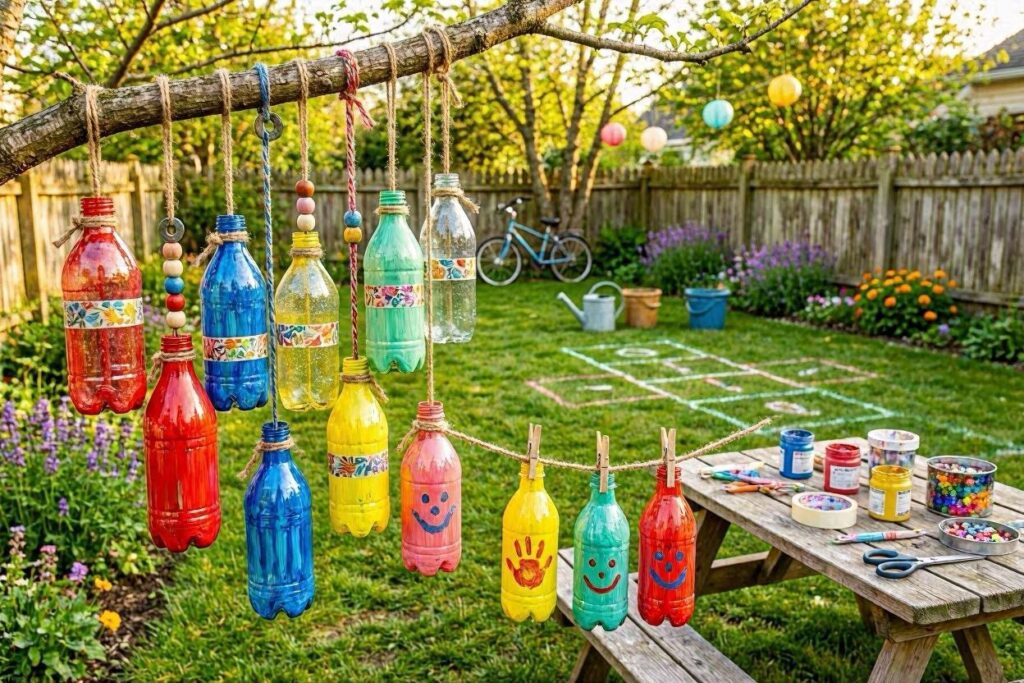
19. Bottle Wind Chimes Craft
This is a really fun outdoor bottle art project for kids, especially during warmer months. The bottles clink softly in the breeze, and kids love hearing something they made with their own hands.
Materials needed:
- Several small plastic or glass bottles
- Paint in bright colors
- String or fishing line
- A sturdy stick or dowel rod
Step-by-step:
- Paint each bottle a different bright color. Let them dry.
- Cut strings of varying lengths.
- Tie each string tightly around the neck of a bottle.
- Tie the other ends of the strings along the length of the dowel rod.
- Tie a longer string to each end of the rod for hanging.
- Hang outside where the breeze can reach it.
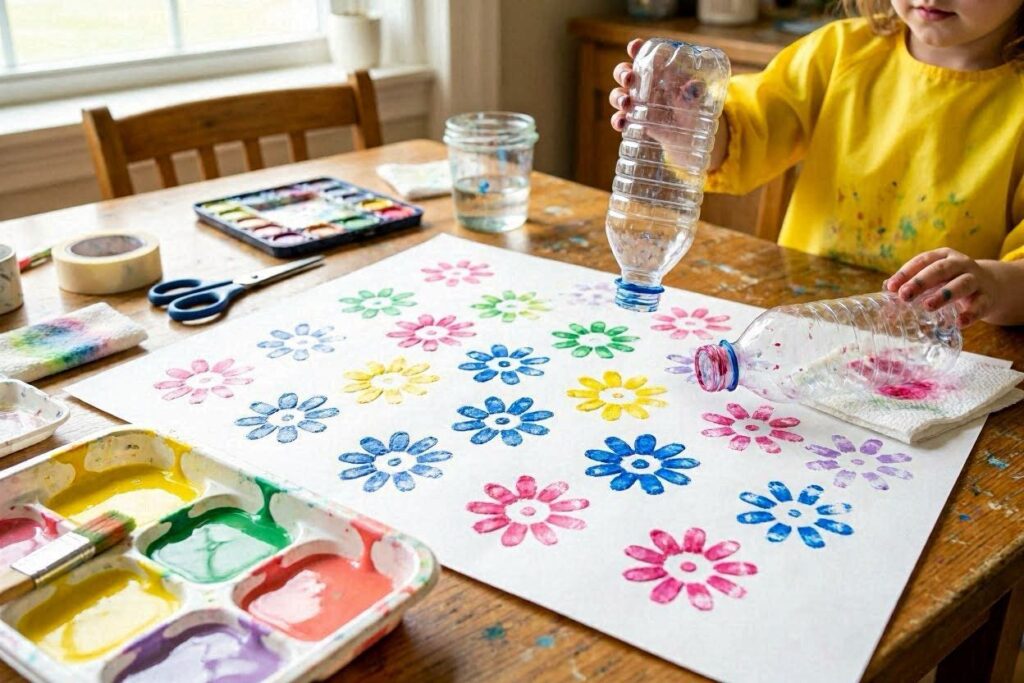
20. Bottle Flower Stamp Art
Did you know that the bottom of a plastic bottle makes a perfect flower shape when dipped in paint? This is one of those brilliant, easy bottle art ideas that produces really beautiful prints with almost no skill required.
Materials needed:
- Empty plastic bottle
- Washable paint in bright flower colors
- White cardstock or paper
- A shallow dish for paint
Step-by-step:
- Pour a thin layer of paint into a shallow dish.
- Dip the bottom of the plastic bottle straight down into the paint.
- Press firmly onto the paper and lift straight up.
- Repeat in different colors all over the paper.
- Once dry, add stems and leaves with a green marker or paint.
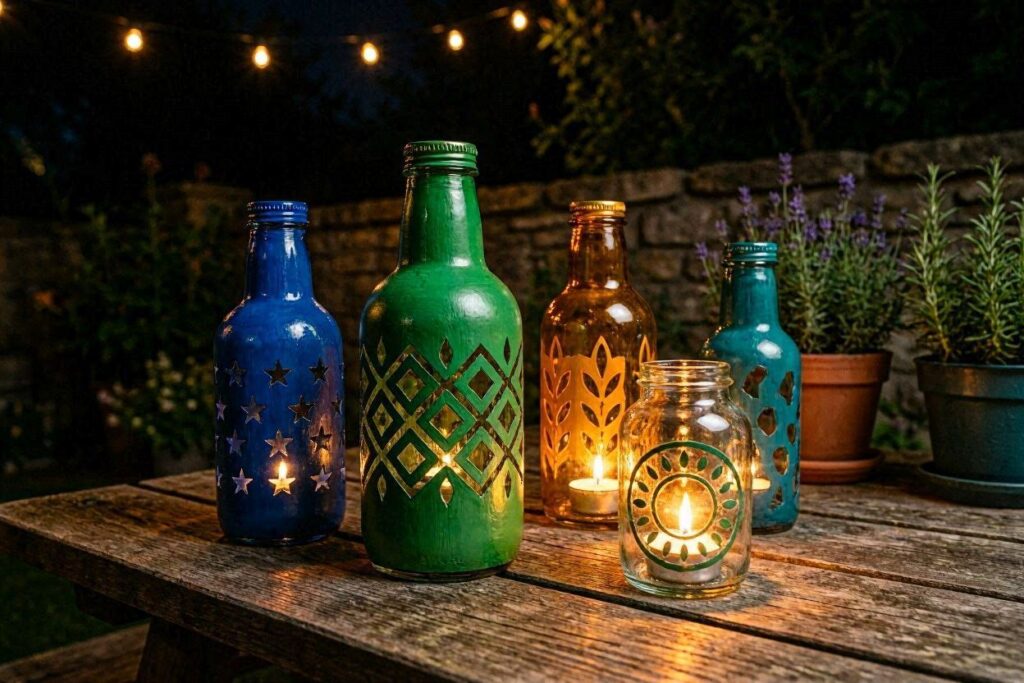
21. Bottle Lantern
This is a beautiful bottle art project that kids can use as a nightlight. The cut-out patterns cast the most gorgeous shadows on the walls, and kids love showing it off at bedtime.
Materials needed:
- Plastic bottle
- Sharp scissors or craft knife (adult use)
- Battery-operated string lights or LED tea lights
- Paint or colored permanent markers
Step-by-step:
- An adult cuts small star, heart, or moon shapes into the bottle using a craft knife.
- Kids paint or color the bottle in their chosen colors.
- Let the paint dry completely.
- Drop the battery-operated lights inside through the opening.
- Turn off the room lights and enjoy the magical glow.
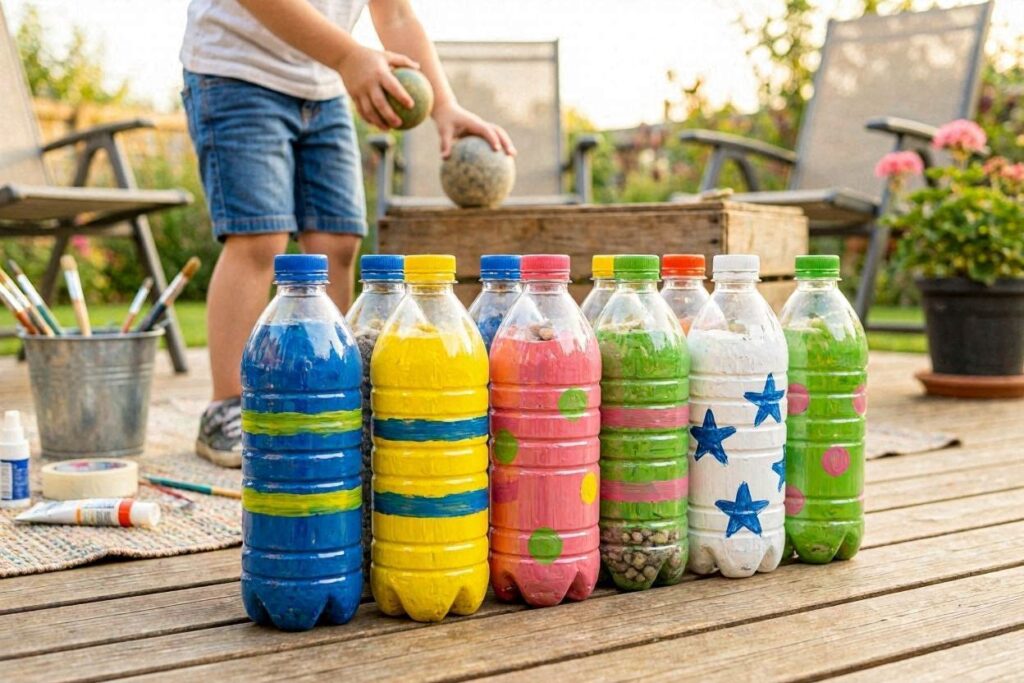
22. Bottle Bowling Set
This is one of those DIY bottle crafts for kids that turns into a whole afternoon of play once the crafting is done. Set up the bottles as bowling pins and roll a ball — simple, cheap, and so much fun.
Materials needed:
- 6 or 10 small matching plastic bottles
- Sand or water to fill them slightly (for stability)
- Paint in bright colors with numbers painted on each
- A small ball
Step-by-step:
- Fill each bottle a quarter full with water or sand.
- Replace and seal the lids tightly.
- Paint each bottle a bright color. Let dry.
- Paint a number on each bottle — 1 through 6 or 1 through 10.
- Set them up in a triangle formation and bowl away!
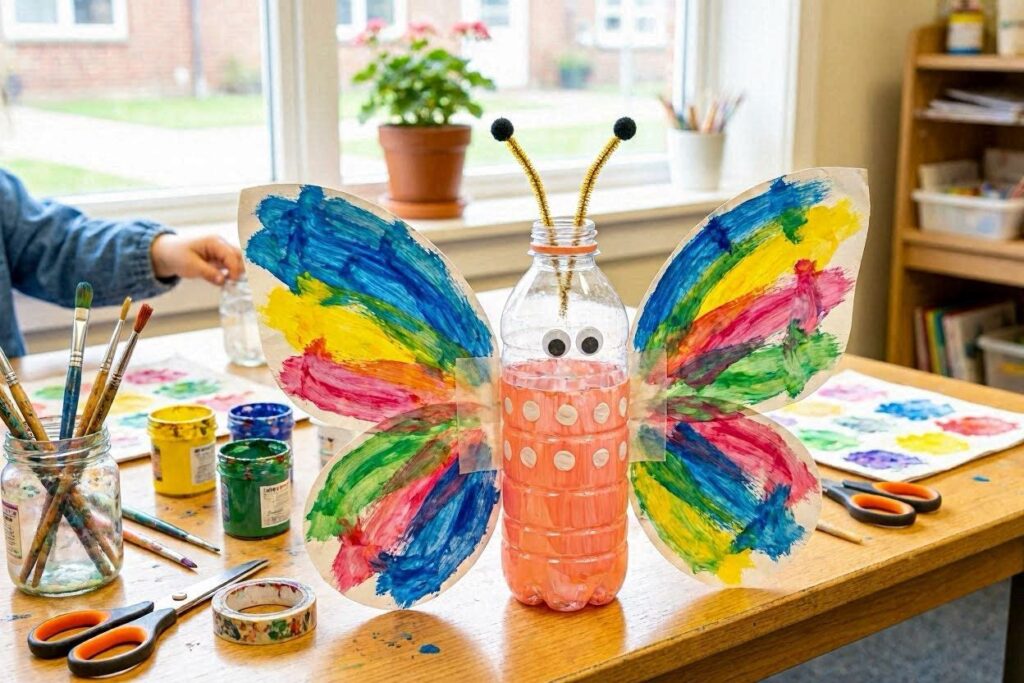
23. Bottle Butterfly
This is such a sweet bottle art project for kids in spring. The wings are made by cutting the bottle itself, which means every butterfly turns out naturally symmetrical and beautiful.
Materials needed:
- Clear plastic bottle
- Permanent markers or paint
- Pipe cleaners for antennae
- Scissors (adult cuts the wings)
Step-by-step:
- An adult cuts the bottle lengthwise down the middle, creating two symmetrical wing halves.
- Lay the wings flat and let kids color them with bright permanent markers.
- Rejoin the two halves at the center with a pipe cleaner wound around tightly.
- Bend the top two ends of the pipe cleaner into antennae curls.
- Add googly eyes to the pipe cleaner body if desired.
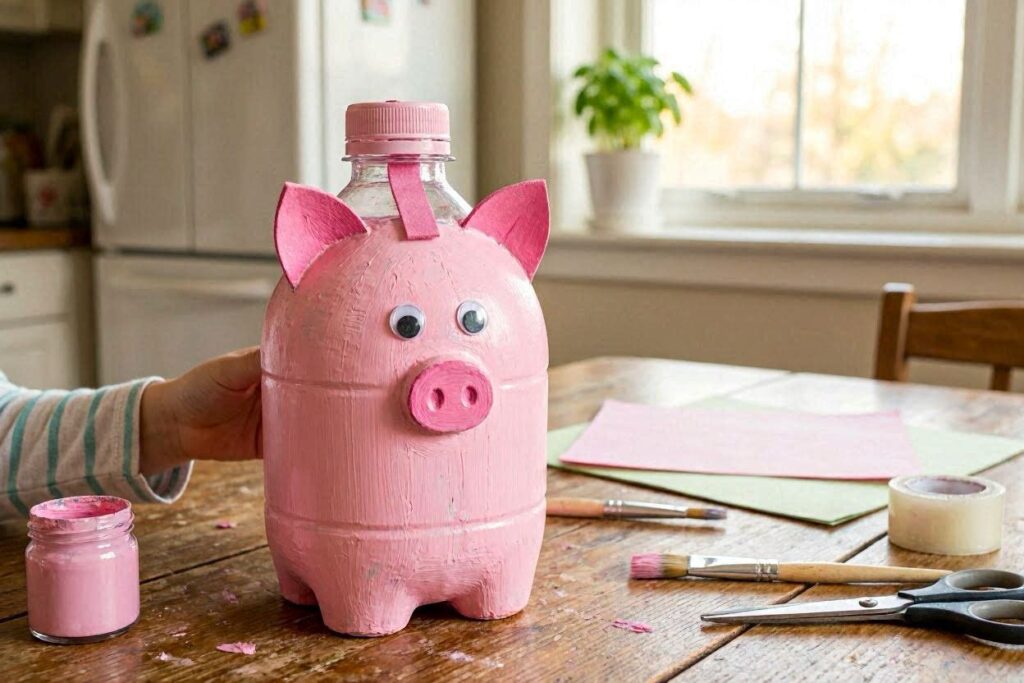
24. Bottle Piggy Bank
Teaching kids about saving money while doing a craft is a wonderful double win. This easy bottle art idea is one of those projects that kids use and love for months after they make it.
Materials needed:
- Plastic bottle with a flat base
- Pink paint
- Four bottle caps as legs
- Pink foam for ears and a curly tail
- Googly eyes
- Craft knife for coin slot (adult use)
Step-by-step:
- An adult cuts a small coin slot in the top of the bottle.
- Paint the whole bottle pink. Let it dry.
- Glue four bottle caps to the underside as legs.
- Cut pig ears and a curly tail from pink foam and glue on.
- Add googly eyes and draw a nose with a black marker.
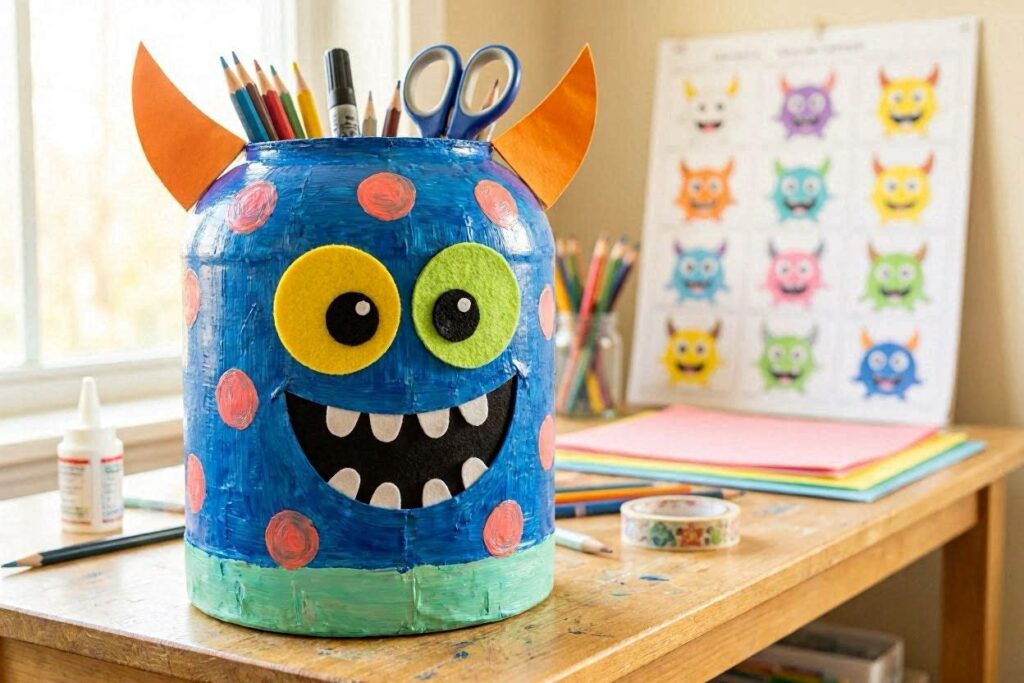
25. Bottle Monster Pencil Holder
Last but absolutely not least, this monster bottle art project is a total crowd-pleaser. Kids get to invent their own monster character, which makes this one of the most creative, easy bottle art ideas in the whole list.
Materials needed:
- Plastic bottle (top removed by adult)
- Bright paint — any monster color works
- Googly eyes (the bigger the better)
- Foam or felt for teeth, horns, or hair
- Glue
Step-by-step:
- Paint the bottle in your chosen monster color. Let it dry completely.
- Glue on oversized googly eyes — the sillier, the better.
- Cut jagged tooth shapes from white foam and glue them around the rim at the top.
- Add horns, spikes, or wild hair from felt or pipe cleaners.
- Let kids give their monster a name and fill it with pencils or crayons.
Quick Tips for Doing Bottle Art for Kids at Home
Now that you have 25 ideas to work with, here are a few things that will make your bottle art sessions go much more smoothly:
- Cover your table first. A plastic tablecloth or a few sheets of newspaper saves so much cleanup time.
- Let the paint dry between layers. Rushing this is the number one reason crafts fall apart.
- Do the cutting yourself. Always handle scissors and craft knives for anything sharp. Kids can do the painting, gluing, and decorating.
- Keep it simple for toddlers. Younger children do best with painting, stamping, and sticking. Save the more complex builds for older kids.
- Make it a group project. Siblings working together on one big craft, like the bowling set or wind chimes, builds teamwork and keeps everyone busy longer.
If you want to extend your craft afternoon even further, grab some of these free printable coloring pages for kids — they are perfect for keeping kids busy while the paint on their bottles dries!
And mama, doing crafts with your kids is wonderful, but you also deserve a break sometimes. If you are feeling stretched thin, take a look at these 30 quick self-care ideas for moms to recharge without guilt. You cannot pour from an empty bottle — pun intended.
Final Thoughts on These Easy Bottle Art Ideas
There you have it: 25 easy bottle art ideas for kids that are fun, budget-friendly, and genuinely beautiful when finished. The best part is that you already have most of what you need sitting in your recycling bin. So next time you are staring at a pile of empty bottles and a bored child, you will know exactly what to do.
I would absolutely love to see what you make with your little ones. Share your bottle art for kids photos in the comments below or tag me on social media — seeing your creations honestly makes my whole day.
And if you are looking for even more craft and activity inspiration, be sure to check out our full collection of kids’ activities and sensory ideas over at MomLife with Ada.
🛍️ Want more printable activities and resources for your little ones? Visit the MomLife with Ada Shop on Selar for instant-download printables, activity packs, and more!
Happy crafting!
Ada 💛
📌 Found this helpful? Pin it to your Pinterest board so you can come back to it anytime!